TL;DR:
- Studded tires with 200+ carbide studs are essential for ice—brands like Schwalbe Marathon Winter ($75-90) actually grip when nothing else will
- Drop 10+ gear inches from your summer setup—run 42×16 or 46×18 (around 67-68 gear inches) instead of that steep 48/17 you use in July
- Lower tire pressure to 25-35 PSI for studded tires so the studs protrude enough to bite into ice properly and increase your contact patch
- Fixed gear bikes give superior winter traction feedback—constant pedaling means you feel every slip instantly, unlike freewheels where you’re just coasting and hoping
Most cyclists think fixed gear bikes and winter conditions mix like oil and water. Dead wrong 🥶.
Here’s what nobody tells you: fixed gears actually excel in winter—you just need to know how to set them up. The conventional wisdom about braking and traction? Backwards. When you’re locked into that fixed drivetrain, you get instantaneous feedback about road conditions that geared bikes simply cannot match ⚡.
This guide covers the best anti-skid tires for ice, the specific gear ratio changes fixed gear riders need, and cold-weather techniques that keep you upright when roads turn into skating rinks.
A video titled “I Tried Anti-Skid Fixed Gear Tires!” from the Zach Gallardo YouTube channel.
Why Fixed Gear Bikes Actually Thrive in Winter
The internet will tell you fixed gears are suicide on ice. Those people haven’t ridden one through a proper winter.
Here’s the deal: constant power to your rear wheel means you feel every micro-slip instantly. On a freewheel, you’re coasting through sketchy patches hoping for the best. On a fixed gear, your legs are always connected—you get immediate feedback when traction starts breaking.
Think of it like walking on ice. When your foot slips, you feel it through your leg and adjust immediately. That’s exactly what happens on a fixed gear. Your pedals communicate road conditions directly to your legs, giving you milliseconds to react before a slip becomes a crash.

Did you know?
At -30°C, freewheel pawls can actually freeze solid, leaving you spinning freely in both directions with zero engagement. Fixed gears don’t have pawls, so they’re immune to this particular failure mode that strands freewheel riders.
Plus, built-in engine braking is huge. No grabbing brakes and locking up a wheel—just resist the pedals and modulate your deceleration smoothly. Same physics as downshifting in a car on icy roads, and genuinely better than rim brakes on frozen rims.
The bonus? Fewer parts to fail or freeze. No derailleur clogged with salt and slush. No cassette full of frozen grit. No cables that stiffen in subzero temps. Just you, a chain, and two cogs.
Simple is reliable when it’s 15°F outside.
Fixed Gear Winter Challenges You Need to Know
Let’s not sugarcoat this—fixed gears do have unique challenges.
You cannot coast through dicey sections. If you hit black ice on a geared bike, you might coast through while holding steady. On a fixed gear, those pedals are spinning whether you want them to or not. If your rear wheel loses grip while you’re applying forward pressure? You’re going down.
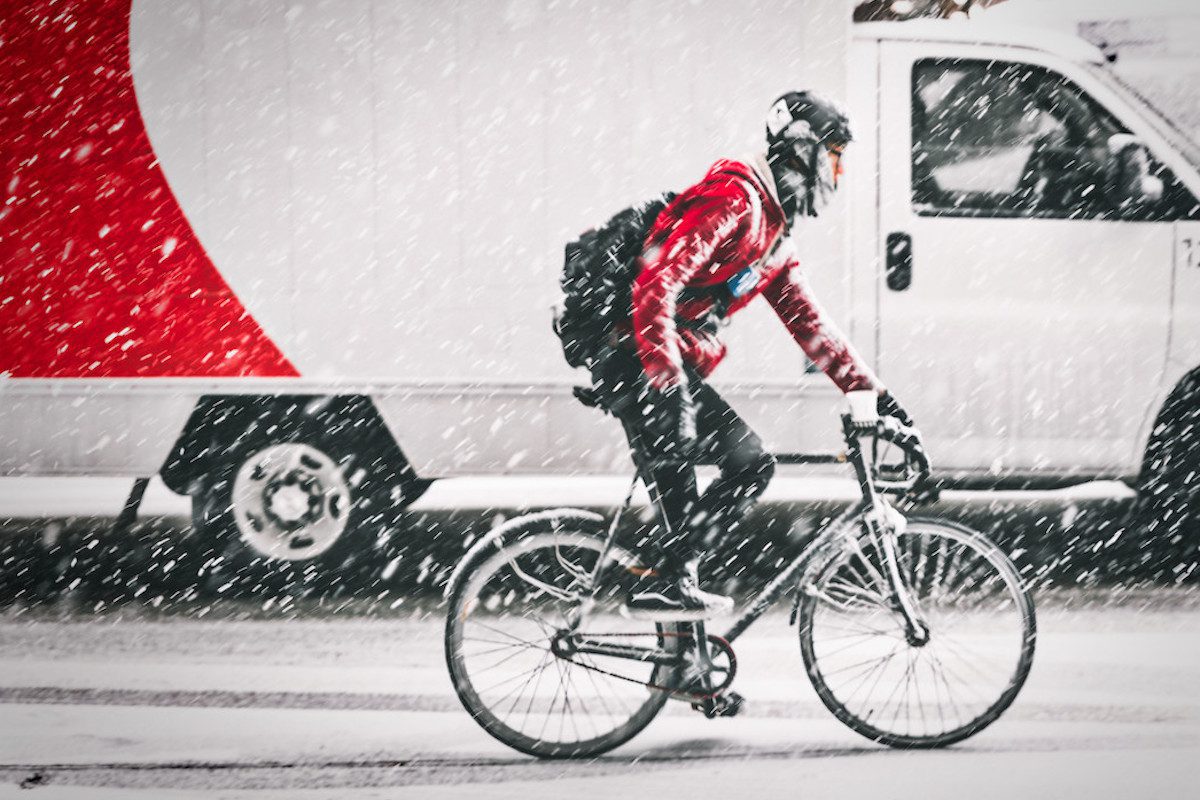
This is why skid stopping is literally insane on ice. Some fixed gear riders think their sick skids work year-round. They don’t. Locking your rear wheel on ice guarantees you’ll slide uncontrollably until physics decides to stop you—usually against something solid. Learn proper fixed gear braking techniques instead of relying on skids.
Your summer 48/17 that feels perfect in July? Way too tall for powering through six inches of slush. Too much resistance when you need momentum, too much torque when you’re trying not to break traction.
DO THIS:
- Run a front brake as backup
- Lower your gear ratio by 10+ gear inches
- Master resistance pedaling
- Accept spinning faster on descents
- Check chain tension before every ride
DON’T DO THIS:
- Rely on skid stops for primary braking
- Keep your summer ratio (you’ll stall in slush)
- Try powering through deep snow in too high a gear
- Assume constant pedaling = constant traction
- Ride brakeless in winter (just don’t)
Winter Tire Technology: What Actually Grips Ice
Let’s talk science without putting you to sleep.
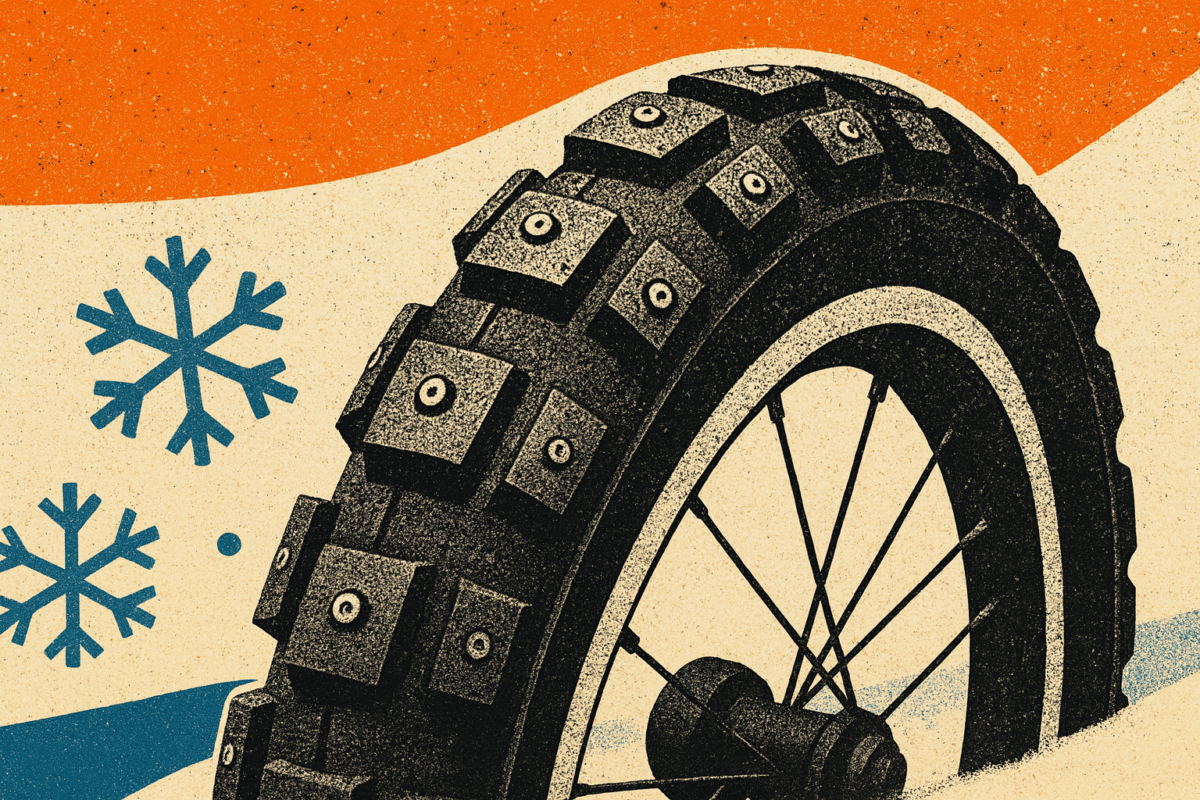
Studded tires use carbide or steel studs that physically penetrate ice to create mechanical grip. They’re not magic—just tiny metal spikes digging into frozen surfaces. Tungsten carbide studs are harder and last longer than steel (about 5x the lifespan), but they’re also heavier and cost more.

The rubber compound matters almost as much. Standard bike tire rubber gets rock-hard below freezing, losing all grip. Winter-specific compounds stay flexible down to -25°C (-13°F), maintaining rubber-to-road contact even when temperatures plummet.
Here’s the counterintuitive part: tread pattern matters less than you think on ice. Once you’re on actual ice, mechanical grip from studs dominates everything else. Tread helps with snow clearing and slush channeling, but on that glazed black ice at the bottom of the hill? Studs or nothing.

Warning…
The Schwalbe Marathon Winter Plus requires a 40km break-in period on dry pavement where you avoid hard acceleration and braking. This seats the studs properly in the casing. Skip this and you’ll be leaving a trail of expensive carbide behind you on your first real winter ride.
One more thing: pressure matters hugely with studded tires. Too high and the studs sit flush with the rubber—basically useless. You need them at the lower end of the recommended range (25-35 PSI for most 700c studded tires) so the studs protrude enough to bite.
About the noise: Studded tires create a constant humming sound on dry pavement from the metal studs hitting asphalt. It’s not ear-splitting, but it’s noticeable—kind of like driving a car with snow tires in summer. At maximum pressure, the noise decreases slightly, but it never goes away completely. Something to consider if you’re noise-sensitive or ride early mornings in quiet neighborhoods.
Best Winter Tires for Fixed Gear Bikes (For Ice and Black Ice: Studded Options)
When roads turn into a skating rink, you need metal between you and disaster.
With 240 tungsten carbide studs and SmartGuard puncture protection, it handles everything from glare ice to broken glass in February slush. At $75-90 per tire, it’s not cheap—but compare that to an ER visit from eating shit on black ice.
Available in 700x35c and 700x40c, these fit most fixed gear setups. The wider 40c version gives you more float on snow but won’t fit tighter track-style frames. The spikes work best at minimum pressure for ice grip, but you can pump them up to maximum for quieter riding on clear pavement.
Takes a different approach with 140 steel-carbide studs in a narrower 700x30c profile. The theory: skinny slices through surface snow to grip underneath. Reviews are mixed—some riders love it, others found it sketchy in rutted conditions.
The advantage? It’s lighter (~650g vs 800g for the Schwalbes) and faster-rolling when you hit clear pavement. The downside? Some riders report losing studs after just a few rides, and the narrow profile can track in ruts.
The odd one out—it’s not studded. Instead, it uses lamellar tread patterns (think micro-sipes like car winter tires) and a special cold-weather compound that works from -25°C to +7°C.
For pure ice? You’ll want studs. But for mixed winter conditions without frequent black ice, these are worth considering at $50-70. The weight savings alone (470g) might matter if you’re doing long commutes.
| Tire Model | Studs | Weight | Width | Best For | Price |
|---|---|---|---|---|---|
| Schwalbe Marathon Winter Plus | 240 tungsten carbide | ~800g | 700x35c, 700x40c | Ice & all conditions | $75-90 |
| 45NRTH Xerxes | 140 steel-carbide | ~650g | 700x30c | Commuting, plowed roads | $65-80 |
| Continental Top Contact Winter II | 0 (siped only) | ~470g | 700x37c, 700x42c | Packed snow, cold rain | $50-70 |
How to Install Winter Tires
Installing winter tires isn’t harder than regular tires, but if you’ve never swapped tires before:
- Deflate your current tire completely (press valve stem)
- Use tire levers to pry one side of the tire bead off the rim
- Remove the old tire and tube completely
- Check the rim for sharp edges or debris
- Position the new tire on one side of the rim
- Insert the tube slightly inflated so it holds shape
- Work the second bead onto the rim with your hands
- Inflate to recommended pressure and check bead is seated
If the tire won’t mount or seems impossibly tight, that’s normal for new tires—they loosen up. A bit of soapy water on the bead helps.
For Packed Snow and Slush
If you’re mostly dealing with snow rather than ice, aggressive tread becomes more important than studs.
Wider tires with deep, widely-spaced lugs work best. They channel slush away and provide mechanical grip in compressed snow. Some riders run cyclocross-style tires in winter—not ideal for ice, but fine for snowy conditions where you’re mostly concerned with avoiding ruts.
The trick with non-studded winter tires: you need to know your route. Hit one unexpected ice patch and you’re learning physics the hard way.
Fixed Gear Winter Setup
Gear Ratio: Lower Than You Think
This is where most fixed gear riders screw up badly.
Your summer ratio is too tall. That 48/17 (~74 gear inches) that feels perfect in August? It’s garbage when you’re trying to maintain momentum through slush without breaking traction or spinning out on ice.
Drop down to something like 42×16 (68 gear inches) or 46×18 (67 gear inches). The lower ratio lets you maintain higher cadence with less torque at the rear wheel—critical when traction is limited and you need to avoid wheel spin.
For context: most street riders run 2.7-3.0 ratios (about 70-80 gear inches) in summer. For winter, drop to 2.5-2.7 ratios. That’s roughly a 10 gear inch drop from your normal setup.
Yeah, you’ll spin faster on descents—potentially 110+ RPM going downhill. Deal with it. Better to spin like mad than stall climbing in too high a gear and have your rear wheel spin uselessly while you’re clipped in.

Success!
Get a flip-flop hub with two different cogs. Run 16t on one side for winter, 15t or 14t for summer. Swap by flipping your rear wheel—takes 5 minutes with a wrench. No need to buy new cogs every season.
Forget Skid Patches in Winter

If you’re relying on skid stops in winter, you’re doing it wrong.
Forget everything you know about skid patches. In winter, skidding is emergency-only. Your primary braking method is resistance pedaling—using your legs to fight the drivetrain and slow the bike smoothly.
When you do need to brake hard:
Proper Winter Braking
- Shift weight back slightly (keeps pressure on rear)
- Gradual resistance through pedals (don’t lock up)
- Front brake as secondary if needed
- Be ready to unclip and put a foot down
Studded tires change the skid patch math anyway since you’re ideally not wearing specific spots—you’re using leg pressure and front brake together. Save the skids for summer Instagram clips.
Winter Riding Techniques
Tire Pressure for Ice vs Snow
Drop your pressure 10-15 PSI below summer settings. This increases contact patch and, crucially for studded tires, lets the studs protrude enough to bite into ice.
With studded tires in 700c road sizing, you want 25-35 PSI. Too high and the studs sit flush with the rubber, defeating the entire purpose. Too low and you’re risking pinch flats and sketchy handling on clear pavement.
Pressure by Condition
- Black ice/glare ice: Minimum recommended (25-28 PSI for full stud exposure)
- Packed snow: 5-10 PSI above minimum (30-35 PSI)
- Clear cold pavement: Maximum recommended (35-40 PSI for quieter, faster rolling)
- Mixed conditions: Start at 30 PSI and adjust based on what you encounter
Remember: temperatures affect pressure. A tire pumped to 30 PSI in your warm house will drop to about 27 PSI once it’s been outside in freezing temps for 20 minutes. Check pressure when cold.
Reading Road Conditions
Black ice is called “black” because you can’t see it. It’s a near-invisible glaze forming when temps hover around freezing with any moisture present.
Watch for it:
- Shaded areas that don’t get sun
- Bridge decks (freeze first, always)
- Anywhere water runs across the road
- Bottom of hills where melt-water collects
- Under overpasses

Critical warning!
If you see a patch of road that looks “wet” but everything else is dry, that’s black ice. Especially dangerous at dawn when temps drop below freezing but the road surface still looks damp from yesterday’s melt.
The fresh snow line is often grippier than the polished car track. You’re pushing through more resistance, but that virgin snow provides way more grip than the compressed, glazed-over tire ruts where cars have packed it into an ice-like surface.
Cold Weather Maintenance
Road salt is the real enemy. It’s highly corrosive and will eat your bike from the inside out if you don’t fight back daily.
Use wet lube, not dry or wax-based. Wet lube penetrates better in cold and provides a barrier against moisture and salt. Wipe your chain down after every ride—yes, every ride. Takes 30 seconds with a rag. Reapply lube if the chain looks dry or sounds squeaky.
Rinse the bike weekly minimum. You don’t need a full deep clean every time, but get the salt off. Plain water works; warm water works better. Never use a pressure washer—it forces water into bearings. Just a bucket and sponge.

Pro tip
Consider a dedicated winter chain. The KMC Rust Buster chain has improved corrosion resistance and costs about $25. When spring comes, that chain goes in the parts bin and you throw on a fresh one. Chains are cheap—new bearings and a corroded frame cost hundreds.
Some riders apply frame protectant (like car wax or ACF-50) before winter to create a barrier against salt. Focus on the bottom bracket area, chainstays, and anywhere salt spray hits. One application at the start of winter, another mid-season.
Frequently Asked Questions
Frequently asked questions (FAQ)
Yes, but with major caveats. You need proper studded tires (200+ studs minimum), lower gear ratios, and the skill to use leg resistance instead of skid stopping. Fixed gears can be safer than freewheels on ice because of superior traction feedback, but only if you adapt your technique completely. Riding the same way you do in summer will put you on the ground fast. And honestly? Running a front brake in winter is non-negotiable.
Both wheels for fixed gear. Many commuters run studs front-only to save money and reduce rolling resistance, but on a fixed gear where you’re constantly putting power to the rear, you need that traction back there. Front-only might work for casual single-speed riding, but for fixed gear winter riding, go both wheels. The rear is where you’re making power and controlling speed through resistance.
Drop about 10 gear inches from your summer setup. If you run 48/17 (74 gear inches) in summer, go to 42/16 (68 gear inches) or 46/18 (67 gear inches) for winter. This gives you better control in slush, easier starts from stops, and less torque to the rear wheel so you don’t break traction as easily. The trade-off is spinning faster on descents, but that’s manageable.
Wipe it down after every ride with a dry rag. Use quality wet lube (not dry/wax formulas) and reapply frequently—every 2-3 rides minimum. Consider using a KMC Rust Buster chain which has improved corrosion resistance. Accept that winter chains are somewhat disposable—budget $20-30 for replacement in spring. Better a new chain than a new cassette or chainring that got chewed up by a rusty, gritty chain.
Counterintuitively, not always. In really deep powder snow, slightly higher pressure can help you cut down to firmer base underneath rather than floating on top. For packed snow and mixed conditions, lower pressure (25-30 PSI) gives you more contact patch and better grip. Experiment based on what you’re actually encountering—there’s no one-size-fits-all answer.
You can run them year-round, but you probably won’t want to. The constant humming noise on dry pavement gets irritating fast, and the studs wear down quicker on bare asphalt than on ice. Plus, the added rolling resistance and weight slow you down noticeably in summer. Better to swap them on when temperatures consistently drop below freezing and swap them off when spring hits. Most riders keep winter tires on a second wheelset for quick changes.
Yes, they work fine on dry pavement—the studs grip into regular asphalt without issues. You can even take fast corners safely. Unlike car studded tires (which are banned in some places for road damage), bicycle studded tires are legal everywhere because they’re too light to damage pavement. The main downside is the noise and slightly slower rolling speed, not road damage.
Final Thoughts
Winter fixed gear riding isn’t for everyone. It needs preparation, skill adaptation, and acceptance that you’ll be slower than summer.
But there’s something pure about being locked into your drivetrain when conditions get real. That constant connection between legs and rear wheel—the immediate feedback when traction shifts—it makes you a better bike handler.
You learn to read surfaces before you hit them. Weight your bike properly. Use your whole body to manage the machine in marginal conditions.
Get the right tires. Drop your gear ratio 10 inches. Learn resistance pedaling. Maintain your bike religiously. The rest is just miles and gradually expanding your comfort zone with each snowfall you ride through instead of calling an Uber.
See you out there this winter.

